Saturday, August 17, 2013

Baby Quilt is Finished, Part 2

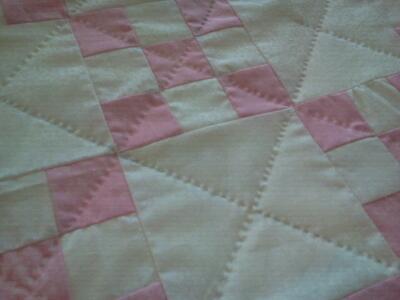
Here it is the day before the baby shower and I am waiting on the pink baby quilt to finish drying!  I don't like to dry new quilts in the dryer, especially a gift quilt. For that matter, I don't dry any of my hand made quilts in the dryer, it wears them out quicker.  I thought I had finished the baby quilt but then noticed that the border was kind of wavy. I thought that a little quilting would straighten it out. Here is the border with the quilting. I added a little cable stitch. Hope you can see it.


Here is a picture that is closer on the cable stitch in case the above picture doesn't show well.


I was starting to panic a little because it was Thursday and I hadn't finished the cable on the borders, but my daughter offered to help with the quilting on the borders. So with her help, I calmed down and we finished in time!  Now the only thing left is for it to dry and I will wrap it later today. . .the party is tomorrow!


Do you think the borders look wavy now?


My daughter and her family are leaving tomorrow! :( I have had so much fun while they were here.  Yesterday we went to the Pecos Indian Ruins National Park. My husband and I have been there before, but it is a very enjoyable place to visit and see all the history behind that area.  We then went to Santa Fe, ate some Chinese food and went shopping at my favorite hobbies and crafts store!  When we got home, we were all exhausted! It was a full day starting at 8 a.m. and ending at 8 p.m.

After my daughter leaves I will set up my sewing again and continue with my string basket weave quilt.  I will let you know how that goes.  I am almost ready to put it on the quilting frame to hand quilt it and start another one.  All in all, I will be making 3 of the string basket weave quilts for my kids. I have 4 kids, but I have already made my youngest son a quilt. So, I only need 3 more!  

Of course, that's only my children.  I still need to make quilts for all the grandchildren!  Oh my goodness!

Meanwhile . . .keep on quilting everyone!

Aveli

Wednesday, August 14, 2013

Having a Great Time with my Daughter!

My daughter, her husband, her little girl arrived and have been here since last Friday!  YAY!

We went to Santa Fe on Saturday to meet up with the younger daughter and her family.  All total, we were eleven!  We had so much fun!  We went to lunch and then went craft shopping.  The only problem was that my son's truck would not start!!  So, we moved all his stuff to our car and parked the truck in the parking lot.  Left a note that said we would be back to haul it home on Sunday.

When we got home, it was late so we called it a night.  Early Sunday morning, I got up to make breakfast for everyone. Bacon, potatoes, bacon and fresh coffee!  My workers -- my son and my son-in-law -- went to work on the roof of our new storage shed.  They tore off the old roofing paper, took out all the nails and put on new self-stick roofing paper.  The hail storm 2 weeks ago had torn up the roofing paper that we had just laid the week before and we had to replace it.  They worked so quickly that they got half the "Pro-panel" aluminum roofing put on.

At dinner time, we ate the barbecue ribs that my son had prepared in the early morning hours and had cooked all day while I supervised.  We invited the two neighbor ladies and my husband's cousin came by so we asked him to stay for dinner also!  The dinner menu, besides the ribs, had macaroni salad that I made and corn on the cob cooked on the grill. The whole dinner was just great and the ribs were scrumptious!  Early Monday morning, the workers started on the other half of the roof and finished just as the rain started coming down.  As soon as the work was done, my son got his things and left for his 3 hour trip back to Albuquerque and to work that evening!

All in all, it was a pretty successful weekend!

Today, my daughter is horseback riding with my husband's cousin in the mountains. They will be here until Sunday.  Thank goodness she is helping me with the border on the pink baby quilt!  I have to have it ready for Sunday . . .the party is on Sunday! I promise to post pictures of the completely finished baby quilt.

In the meantime. . .keep on quilting!
Aveli

Monday, August 5, 2013

The Count Down has started!

D-Day is 4 1/2 days away!

Daughter Day that is!  She, hubby and my precious granddaughter will be here on Friday, the 9th at 3:30p.m. in Las Vegas, New Mexico on the train!

I am so excited! I still have a million things to do to baby proof this cabin. I have just finished taking out all my sewing fabrics, tools and knick knacks. Next comes installing the new rugs. Then changing the beds and washing all the linens!  Whew! I am tired just writing about it.

I have also decided to quilt on the pink baby quilt. I will put a cable pattern on the white border around the quilt.  Hopefully that will disguise the wrinkles that showed up after I put the binding in.


I am also going to make a little mattress and pillow for the baby doll cradle for my granddaughter.  Hope I get everything done in time because I would like to make a cake to surprise them with when they get here. I guess I can make that on Friday morning!

O.K. gotta go!

Keep on Quilting. . .

Aveli

Saturday, August 3, 2013

Customer's Picture of Hexie Box

Linda requested the hexie box pattern, which is free.  She made the following boxes with the free pattern.


The purple and the printed box are made out of cardstock. The plain white was made out of a cereal box.  Great for recycling!

Here is what she said:

"Dear Aveli,  I am sending pix of my attempts at making hexagon boxes.  The cereal box boxes were fine and I, like you, go for function vs. pretty :). It helped to score with the retracted end of a pen on the wrong side  to make fold lines.  Out of curiosity I did buy a couple sheets of scrapbook paper.  Being less stiff, it made sharper folds. I hope that you can see the differences."

As a thank you gift, I am sending her a packet of Hexie Freezer Shapes. Thank You Linda!

You too can get a free packet of Precut Hexagon Freezer Paper Shapes.  Anytime you use one of our products, take a picture and include a short comment or tip and email it to us.

When we use your picture and comment, we will mail you a free packet of precut hexagon Freezer Paper shapes.

Meanwhile. . .
Keep on Quilting!

Aveli

Finally Pink Baby Quilt is Done!

 I haven't been posting the past few days because I have been diligently frantically working on getting this pink baby quilt finished!

Well, Here it is!  I just finished the binding and took some pictures to post.  I didn't put any quilting on the border.  But now that I look at these pictures, I see that the border is still crooked!!!  I guess that I will have to add some kind of quilting in the border to "hide" the crooked wrinkles that I see in the left lower corner and the upper right corner.  I have no idea how that happened! Maybe because I was in a rush to finish before my daughter comes next week.


 This is a close up of the hand quilting that I did. It doesn't look too bad! Does it?
 

 There is not much else I can do to improve it, now that it is finished.  I will add a little quilting in the border during this week.  It shouldn't take too long.  Plus, I have to wash it and wrap it in a box.

Now since that is finished, I can get back to my string quilt!  Oh, wait, I have to wait until my daughter leaves from her stay here with us!  

I can't possibly be sewing on the sewing machine because it is in the cabin where they will be staying.  I can't move it because all my sewing supplies are in there too!  Oh well, I guess it's time to get back to my hexagon "insanity" quilt while she is here!

I love my hexagon project! It is still a long ways away from being put together, but I love the hand work.  I am still forming the individual hexies and then forming the individual flowers for the center.

I will post pictures of my progress later this week.

Meanwhile . . .
Keep on Quilting!

Aveli


Tuesday, July 30, 2013

Well Almost Done!

I thought for sure I would finish the pink Irish chain baby quilt for the neighbors great grandbaby today!

But, it seems that although I have finished my hand quilting on the blocks, I can not mark the border for quilting because it is slightly askew!!!

I can't believe that I missed that when mounting the quilt on the frame!  Anyway, I have to fix that before I can finish the binding and I am reconsidering putting any kind of quilting on the border. I so hate ripping things out that I thought were done.  So maybe I can finish tomorrow!  Tonight I am physically finished!  I quilted like a madwoman for the last week and half to get this done and the baby doll quilt too.

I am coming down to the wire to get this done before my daughter arrives next week.  Why do I have to finish it now? Because once my daughter and granddaughter are here we are going to party!  No time for quilting!! Unfortunately!  But she is only going to be here for a week, so I have to make sure every minute is spent with them and enjoying their presence!

Soooo, tomorrow is another great day to quilt!

In the meantime, everyone keep on quilting,

Aveli

Saturday, July 27, 2013

Quilting Away on a Baby Quilt Gift

This is the baby quilt I am working on. My dear neighbor's granddaughter-in-law is expecting a girl in September.  She has been so kind and helpful to us since we moved here that I felt compelled to make this baby quilt for the new baby.


Here you can see a close up of the hand quilting that I am doing. I am almost done with it.  I will post a picture of it when it is finished.

I have to work on this to get it done before my daughter comes on the 9th so I can fold it up and put it away.  Don't want my little granddaughter getting into it.  But, I also still have to make that little mattress and pillow for the Baby Doll Cradle for my granddaughter.  Hope it all gets done in time.

Meanwhile any other projects or UFO's that I have, including the string basket weave quilt, is on the sideline until after my daughter leaves.

I just heard from my youngest son and he said he will be here when the oldest daughter comes from California!  YAY! Now, if we could only get the youngest daughter to bring her little family also, then we could almost have a complete family reunion.  What fun! 

My youngest son wants to rework the roof on the new storage shed we are building.  We had a severe hailstorm and it ripped up the roofing paper that had just been laid the week before.  That has to be replaced before we can put the propanel aluminum shingles.  Maybe my son-in-law will help a little while they are here.  My husband is not physically able to help anymore since his stroke.

Meanwhile, Keep on Quilting!

Aveli


Friday, July 26, 2013

Baby Doll Cradle and Finished Quilt

This is the baby doll cradle that we bought at the flea market. I thought it was a good deal because it is all wood and it was only $12!  You can tell it has been used a lot because it has a few "dirty" little fingerprints on it!  It just needs a good washing and that should take off the fingerprints.

I have put the actual baby doll and the little quilt that I made for it in the cradle so you can see how it will look all together.


It has curved pedestals so it can rock very easily.

 
 Now what I have to do is make a little mattress and pillow so the doll won't be uncomfortable, LOL!

I thought a couple of layers of batting inserted into a pillow type casing should do for the mattress and another couple of small layers for the pillow would be perfect! I think that I will actually attach the little pillow to the mattress so it won't get lost.  Anyway, if it needs washing, I can throw the whole thing in the washing machine!

I was also thinking of adding a few hexagons to the pillow cover.  A while back I made some 1/2" hexagons to see if I was interested in doing that size.  Since then, I have decided that they are too small for me and just put them away.  Those are just the right size for this project!

I will post more photos as I finish the mattress and pillow for the cradle.

Keep on quilting!

Aveli


Tuesday, July 23, 2013

Baby Doll Quilt Finished!

So Yesterday I finished the baby doll quilt! YAY!

I sewed the backing, which is purple and pink hearts, to the quilt top on the machine. You can see the backing in the picture below. I decided on sewing on the machine because I didn't think I had enough time to hand quilt. After I finished sewing the two layers together I needed to bind it and decided to use the border for binding.

First I trimmed the backing close to the quilt top edge as seen below in the picture.


 Next, I rolled the border back onto the backing and tucked it under itself and pinned. See picture below.
 

Here you can see the rolled border from the front -- before and after rolling and pinning.  


I hand stitched the binding in the back and that was it! I loved making this little quilt from all my scrap crumbs.(tiny pieces) It really did save a lot of fabric and makes a very nice little quilt for a baby doll for granddaughter! Now that I saw how cute this came out, I think I will use my other scrap strips to make a table topper for the cabin. Although, I wont use white for the sashing, maybe a wine.

Now to get back to the baby quilt that I am hand quilting for my neighbor's granddaughter who is expecting in September. I will post pictures of that quilt some time later this week when I am finished.

Keep on Quilting!
Aveli

Sunday, July 21, 2013

Hexagon Adventure, Chapter 2

Well as mentioned before I had cut my plastic hexagon template from a 1 gallon plastic milk jug.  Great! Now I am ready to cut the hexagons and start sewing. . .wrong!

What on earth will I use to mark the hexagons?? In my sewing experience I have used chalk, chalk markers and #2 pencil.  But this is quilting! There are so many types of markers out there. I guess the only way to find out which is best is to try them out.

I had heard that you can print on the back of the fabric and then cut shapes out for your quilting. I did that but when I test washed the fabric the ink bled into the rest of the fabric.  I guess that's out. On to markers, I tried regular markers from the dollar store.  First, the tip was too big and chunky and second, they went through the material to the front of the fabric. Then I tried fabric markers, same as the dollar store variety. Then I bought this really expensive pen made for marking on fabric. I got the white one.  It was really neat and was a fine tip and showed up really well and didn't go through the fabric and didn't bleed when washed. So, what was the problem? For some reason, when I was writing on the fabric, the ink didn't show up for a good 30 seconds later. So, for each line I drew I had to wait 30 seconds to make sure the line wasn't crooked or that it had drawn with enough ink. With hexagons having 6 sides, that came out to 3 minutes to draw each hexie!! I had to draw hundreds of these . . .that was not going to work out. I thought I was doing something wrong so I did some research and found out that other quilters were having the same problem as I was with the delay in showing up.

So now I went to pencils.  Regular colored pencils were no good because they need a heavy pressure in order to draw on fabric and that pressure would stretch the fabric. The last resort was my trusty #2 pencil.  Very thin line when sharp, does not need a lot of pressure, washes out and is pretty cheap!  Later I tried a #1 pencil.  Do you know how difficult it is to get a #1 pencil in the mountains?  Practically impossible! I ordered a box of #1 pencils online and used it very successfully.  It is a very soft lead so very little pressure is needed for marking and like #2, washes out completely. Then I discovered that I could get a #1 lead in a mechanical pencil --- I was in heaven.

So here I am merrily drawing and cutting and forming my little hexies.  YAY! I went from wanting a dresser scarf to wanting a bed cover.  So I started looking for a workable pattern where I could use the rows that I had already sewn.  Then I discovered the "Insanity Quilt" made in 1/2" hexies!!!

Oh my word was it beautiful! I was in love! I immediately decided that the hexies I was making were too large . . .LOL! I decided to use my one inch freezer paper foundations that I sell on my website and start all over! OH NO, Really???

Stay tuned for Chapter 3 in my ongoing Hexagon Adventure . . . .

Everyone, keep on quilting!
Aveli

Friday, July 19, 2013

Working the string blocks, baby quilt and more!

Every morning as soon as I get up, I work on my string quilt blocks.  I go straight to the coffee pot, make hot water for my tea and while that is brewing, I sew my 4 1/2 inch string blocks. I have a large supply of strips of various size widths, colors and patterns in a drawer next to my sewing machine. I pull out the strips, sew it onto a foundation paper made from my old phone book and keep repeating until I have 10 blocks sewn. I end the chain piecing with a foundation paper sized 2 1/2 by 8 1/2 inches.  It is from these little "feeder" blocks that I made my granddaughter's "baby doll" quilt.

I know that sounds very organized, but trust me its not!  Sometimes I run out of fabric strips and have to run to my scrap box and clean cut the scraps into various sized strips to put in my drawer next to the sewing machine. I have several plastic boxes full of these scraps. I am trying to justify keeping them or "hoarding" them, as my husband calls it. 

These are scraps left from years of cutting butterflies, cats, hexagons, triangles for my customers' orders.  There are all sizes and weird shaped pieces left.  But, if I cut just so, I can get several strips of different widths and many, many triangles of different sizes! I can't even begin to think of throwing all that fabric away! If that makes me a hoarder, so be it!

I have already made enough blocks to put together a quilt top from these scraps that you can see here Click Here   But, it was not big enough to drape over the side of my double bed.  So that's why I am sewing more blocks.  Plus, after I finish this one, I am making 2 more for my other kids. I think then maybe, I will have used all the scraps in the plastic boxes, LOL!!!

In the meantime, remember the "baby doll" quilt?  Well I finally decided, I am going to quilt it on the machine.  Even though I am not very experienced in machine quilting, I think I will manage with this one because it is so small. I will post a picture when I am done, maybe on Monday???

My hexagon quilt progress will be posted tomorrow!

Have a great time quilting!

Aveli

Tuesday, July 16, 2013

They're Coming! They're Coming!

I feel like Paul Revere with that title. LOL! But, I am excited about my daughter's family visit. She called last night to say they would be here in 2 weeks!

Just barely have enough time to finish my granddaughter's baby doll quilt. I will have to stop working on my string quilt and my cross stitch project and finish that little quilt.

Maybe I should just machine stitch it together with the backing??  What do you think?

If I go ahead with the tying, I can tie it every 2 or 3 inches. The quilt top measures approximately 24"x 26".  If I tie every 2 inches, that means I will have 12 across by 13 down which equals 156 ties. Am I capable of finishing that many ties in 2 weeks? and then do the binding?

The binding is another question. I always do bindings by hand! Should I hand bind or machine bind? Help me out folks what would you do? It's really not a big quilt, but I also have to organize, stash, clean, dust, vacuum and child proof the cabin for their visit.  My granddaughter is only 2 years old, so I have to go over the cabin with a fine tooth comb to child proof.

Any suggestions would be appreciated.  I will start finishing it tomorrow.  Today my "dance card" is already full of preparations for the visit.

I will post the final decision as to the finishing of the baby quilt.  Let me know what you think!

Keep on quilting!
Aveli

Monday, July 15, 2013

Baby! Baby! Baby Doll That Is!

I have finished putting together the Baby Doll Quilt for my granddaughter. And, as promised I have several pictures.

Let me start at the beginning:

I wanted to use scraps for this little quilt because I have been sewing "feeder" paper strips after every step of sewing blocks for other projects.  I have several of these "feeder" paper foundation blocks.  They measure approximately 8 1/2" x 2 1/2". I say approximately because I don't cut them precisely with a ruler. I just take a sheet of 8 1/2 x 11 sheet of paper and cut across the sheet.  I can get 4 strips out of each sheet of paper. I use printer paper that I have already printed on both sides; which I do frequently when testing out sizes of patterns or designing a pattern.  Instead of just chucking them in the trash, I recycle them into these strips to be used for foundation piecing.

So, I took three of these strips and sewed them end to end and came up with an approximate size of the width of the Baby Doll Quilt.  Here is what three strips look like sewn together. I do not remove the paper foundation until the whole blanket is sewn together. This gives the little pieces more stability while I am working with them. Once the blanket is sewn together, I do not need the paper because they have been sewn cross and lengthwise so they have stability on their own.


Once I had sewn enough of these "strip blocks" together, I laid out the little quilt.


I separated the strips because laid out together, with no spaces between strips was too small. So I decided to put some sashing in between each "strip block". Now it was larger. Here it is laid out with the sashing.


Now it was starting to look very nice.  But, I thought it was too small to actually wrap the baby doll in it. So I added another strip and another sashing. Here it is all sewn together with 1 1/2" sashing and 1 1/2" borders.  I put the baby doll on top to make sure that it was big enough to wrap around the doll.  It is!
It measures approximately 24" x 26". The next step is to remove the paper foundations.


I will not put any batting in it because I do not want it to be too bulky for my granddaughter to hold.  The backing is the only thing left for me to add besides the binding and tying. I am planning on tying it with a very thin ribbon. All the fabrics used on this blanket were scraps, even the sashing, backing, and ribbon for tying.  I will post a picture of the completed project.

Hope you enjoyed my journey.  If you have any questions, please feel free to use the contact form on this blog.

Happy quilting!
Aveli

Sunday, July 14, 2013

Flea Market ! Again?

Today, we left early for the flea market. I was determined to find the "pie lady" and "biscochitos" from last week and buy some more.  They were sooooo scrumptious!

Well, once again, my husband couldn't wait till we got to Las Vegas to eat.  This time though, I was also hungry. So, we decided to go to "Kristie's Korner Kafe" down the road from Mora. Mora is 14 miles from our cabin and is our "local" shopping area.  It has a grocery store, several restaurants, churches, schools, library, etc. Kristie's Korner Kafe is one of the better restaurants.  It is very small, only has 6 tables, but is very popular with the locals. Why? because it has great food!  We had breakfast there.  Of course my husband had red chili, let me correct that, red New Mexico chili with his breakfast. Restaurants in New Mexico always have New Mexico chili and the waitress will always ask "Red, Green or Christmas?" "Christmas?" That is a concoction made of both red and green chili . . ."Christmas"! I have never tried "Christmas" chili because I don't care for green chili, but my husband says it's great! He loves either color!!!

So we finish breakfast and off we go to LV.  When we get to the "Flea Market" I noticed that there weren't very many people shopping. My husband says it's probably too early for shoppers. Everyone is probably still in church!  Then I noticed that there were only 5 or 6 vendors!  I know this flea market is small, but this is ridiculous! I was so disappointed :( !  I was really looking forward to an apple pie and biscochitos for the week.

So I kept walking down the aisle and I spied an ironing board attached to some weird contraption. I stopped to look and found an ironing board that converts to a step ladder that converts to a chair.  Here is a picture of it as an ironing board

 This is the way to use it as a stepstool.

And last but not least . . .as a chair!


Isn't it amazing? Have you ever seen anything like it? Please comment if you have. I would love to hear if someone knows what it is called and from what time period it comes.

I loved it! My husband loved it! (which is very unusual) Needless to say, we bought it!!!

After our excursion into the "miniature" sized flea market, we went to Walmart to buy a few groceries and then came home.  Just in time I might say because as we drove into our driveway, a downpour started that has lasted for twenty minutes.  It tapering down some but it is still thunder and lightening and intermittent showers.

My quilting project for today is to finish sewing the "Baby Doll" quilt for my granddaughter. I will post a picture of it when I finish sewing it together tomorrow!

"Talk" to you tomorrow! Keep quilting!
Aveli

Saturday, July 13, 2013

A visit from our Youngest

This past week our youngest son has been visiting us while he was on vacation from work.  What a treat!
It is always great to have him come to visit us.  Even though he only lives 3 hours away, it is difficult to get our schedules on the same track.

So the first thing he says when he gets here is that he is going to barbecue.  Even though it wasn't until yesterday that he got an opportunity to do so, it was nice to hear.  He always makes a great meal!

This time he barbecued 2 whole chickens.  They were scrumptious! And today we get to enjoy more of the leftover chicken.  Makes for great sandwiches. . .especially when combined with the indian pueblo bread made by the Santo Domingo indians.  Yum Yum!

Sadly, he had to leave today. He goes back to work tonight. :(

While he was here, I was working on my string quilt. Making the blocks that is.  I started thinking about making a little doll sized quilt for my granddaughter. They are scheduled to visit some time in August, so I bought my granddaughter a small baby doll.  That way she could have a "baby" to play with while she was here.  Now I am thinking she would have more fun if she could wrap the doll in a blanket.  And of course, a simple receiving blanket type would not do. . .it has to be a quilt!!!

So I started sewing the feeder blocks that I make while working on a project.  You know, a little piece of paper with leftover pieces of fabric on it.  I am using strips of 8 1/2" x 2 or 2 1/2".  I mainly want to conserve the amount of trash I throw out so I recycle my printer paper and print on both sides of the paper.  Especially when I am trying out new layouts for my quilts. After printing on both sides, I cut some into fourths for note paper, i.e., grocery lists, notes to self or husband and so forth. Some of the printer paper goes into providing foundation paper for the feeder blocks.  I cut the printer paper in half to make two 8 1/2 x 5 1/2 pieces and then take those pieces and cut them in half again and end up with the 8 1/2 x 2 1/2 strips.

I layed out the feeder strips into a size that would enable my granddaughter to wrap the doll. I didn't like the layout.  So now, I have added white strips between each feeder strip.  It made the blanket larger and looks nicer I think.

I will finish sewing it up and take pictures tomorrow and post them here.

Tuesday, July 9, 2013

Hexagons

I have always wanted to do a quilt project by "hand".  I know, I know, CRAZY!  Why would I want to do a project by hand when I have 2 perfectly good sewing machines!

Well, to start off, there are a lot of hand sewers out there. I've always wanted to see what kind of woman or "gumption" I would have to have to do this type of thing.  Trust me, you really have to LOVE hand work to do this.

I have always felt drawn to hand work. Since I was little, my mother taught me to embroider and crochet.  Later I would pick up counted cross stitch,  knitting and quilting.  By the way, the cousin who taught me to knit was left handed, so I knit left handed.  It throws a lot of knitters off when they see me.  As one lady commented a long time ago when I was younger -- "What ARE you doing??"

I love to hand quilt my quilts.  But, in my quilting history I had not made an entire quilt by hand instead of the sewing machine. I do a lot of applique, but I usually do piecing. I also wanted a project to do on the road while we travel back and forth from this great state to another.  Applique was out of the question for me because of the finesse needed and my failing "old" eyes.  So, I decided on hexagons!

At first, I decided to start with just a long skinny scarf for my dresser.  But, when I saw how nice it was starting to look, I upped the size to a crib size and then to a double bed size.

Once I decided to do this project, I was overwhelmed by the many choices of methods to do this labor intensive project!

One of the first things I had to decide which template do I use for cutting the hexagons.

I know that I sell pre-cut or die cut hexagon fabrics either alone http://avelisquilts-ivil.tripod.com/id9.html or in kits http://avelisquilts-ivil.tripod.com/pieced_quilt_kits.html (scroll down for hexagons).  I also sell precut Hexagons in freezer paper either precut  or printed on freezer sheets http://avelisquilts-ivil.tripod.com/id165.html.

The problem was that I was like Goldilocks. . . the 2" was too small and the 4" was too big.  I needed something "just right". What I wanted was about 1/4 inch bigger all around the 2" size so that when I sewed them, they would end up being 2".   So, either of the sizes I sell were not "just right"!

Also, remember I couldn't use the freezer paper method, as a template for cutting, because I was going to be in the car and an iron was unavailable. So I went ahead and manually drew the 2" size by tracing around one of my freezer paper die cut pieces on a regular piece of paper.  I then used the freezer paper piece to draw a copy on a piece of milk jug plastic with a permanent marker.  I heartily recommend using this plastic for templates.  It saves throwing the plastic into the landfill, its economical and it endures. Yes, you still have some plastic left over that can't be used.  But, it's a lot less than what you started with.  Just make sure you have a heavy pair of scissors when cutting it because of the thickness.

Another thing I like about milk jug plastic is that the inside of the milk jug is rough textured, not smooth like the outside.  The rough side when placed against the fabric helps to grip the fabric.

I now had a 2" drawing on regular paper and a 2" drawing on a large pieces of milk jug plastic.
Next, I used my ruler and drew an additional 1/4" line all the way around the paper 2" drawing. I now had the size that I desired. I cut this out on the last line that I drew, not the inside line. I used this piece of paper as a template to draw another hexagon on the milk jug plastic.  I now had two hexagons drawn on the milk jug plastic.  one was 2" and one was 2 1/2 inches.  I cut both of them out, punched a hole in the middle of both.  I was ready to start drawing on fabric!!!

WAIT! No I wasn't!  What was I going to use to mark on the fabric??  With all the choices of marking tools now days. . . . Well that's another day's blog entry!

Stay tuned for further adventures in sewing Hexagons and follow my progress!  Meanwhile, back to quilting!!!

Monday, July 8, 2013

Hexagon Box - Repost

I posted this on my old blog in January for New Year's Greeting, but I thought it was worth reposting on this new blog.

Happy New Year to all! Hope all of you will have a great year and quilt all year long!

I had previously made a box for my one inch hexies because I was unable to find or wish to spend money on several boxes to hold them while I was making individual hexies.

Now I have adjusted the pattern and have made a mock up of a box for half inch hexies. Here is a picture of the mock up next to the one inch box.


Notice that the one inch box measures approximately 5 inches while the half inch box measures only two inches.

Here is the inside of the box. You can see how snugly the hexies fit inside. There is no chance for them to shift sideways to get wrinkled.


You can request either the half inch or the one inch pattern by contacting me through the "contact" link on the right.

Of course you can always use the plastic craft boxes available at the local craft store. But this is so much cheaper! All you need is the pattern and a cereal box to glue it to and cut and glue and you have a box!

Hope you enjoy this little pattern and the bigger one too!

Saturday, July 6, 2013

Apple Pie -- Flea Market and Rain!

Today we left our cabin early in the morning so we could go to the Flea Market in Las Vegas, NM. We hadn't gone this year for one reason or another so I was really looking forward to the trip.

It takes 45 to 60 minutes to drive from Guadalupita to Las Vegas, NM; that is why we left before even having breakfast, just one cup of coffee. . . and I am a 2 cup in the a.m. kind of girl!!! LOL!!!

Well, when we got to Mora, 14 miles from the cabin, my husband says he can't wait any longer to eat.  So, we stopped at the local grocery store which is named Russell's. They have a small deli inside the small store. They sell, various items of prepared food.  The variety depends on the time of day.  Since it was 7:00 a.m., they were selling breakfast burritos -- which my husband loves!  He had one breakfast burrito. I was hoping for some chicken taquitos, but it was too early for those.

When we arrived in Vegas, we went straight for the flea market. Not too many people were in attendance but there were several vendors.  Most of the shoppers were at the Las Vegas Fiesta in the Old Town Plaza. One of the very big and popular fiestas that happen this time of year.

One of my favorite vendors at the flea market is the lady with all the baked goods. . . pies, cakes, biscochitos. Biscochitos are the state cookie for New Mexico. There is no baked cookie like them. They are simple but flaky, sweetened with sugar cinamon and a little anise. I have loved them since I was little and so has the whole state of New Mexico. I bought a dozen and a half. I also bought two apple pies. These are flat pies; not the traditional all american apple pie which is piled high with apples.  They are flat, about 3/4 inch thick with a very flaky crust, top and bottom, also sprinkled with sugar and cinammon.  DELICIOUS!  The reason I bought 2 is one for us and one for my husband's cousin. We were going to visit them after we finished in Vegas and it is his birthday. I thought an apple pie was perfect to celebrate his birthday with him and his wife.

Later as I perused all the vendors wares, "Lo and Behold!" there was a quilting frame for sale!  YAY! I had recently got one for myself, but my daughter in law was looking for one. I immediately bought it, only $30. I thought it was a bargain. It is in great shape. It isn't one of the fancy ones, just pieces of wood to put together.  But, very functional and my daughter in law really needed one.

Needless to say, the apple pie was a hit, the quilting frame was a hit and it didn't start raining until we got home!  What a great and perfect day!

Thursday, July 4, 2013

HAPPY FOURTH OF JULY!!!!

Hope everyone has a safe and sober Fourth of July! Enjoy the fireworks, have a great barbecue, play with your kids, your family and take lots of pictures! Have lots of fun! It's the greatest day to play or relax and do nothing! Love it!!

We will be driving up to Eagle Nest to enjoy the fireworks display provided by the town every year. Since it has been so dry here in New Mexico, they banned private fireworks this year. But the show in Eagle Nest is spectacular!

Wednesday, July 3, 2013

Hailstones!

Yesterday we went to visit my husband's cousin. He lives just 7 miles down the road and up the mountain. We wanted him to meet our youngest son, who was visiting for a few days.

Just as we drove into his yard, it started hailing, hailing and increasing in amount and size. By the time we dashed up the stairs to the porch, they were a mixture of  sizes of nickels and quarters. Ouch! I was lucky enough to not get hit by the "quarters" but my husband, his cousin were not as lucky. Our car was pelted for over 20 minutes by this surprise storm.  We were expecting rain, but not hail!

It was over as quickly as it had started. . . no rain, the clouds parted, and the sun shone so brightly on the melting hail in the trees. So much so that it looked like they were decked out in diamonds all over.  So beautiful!

My son met a cousin he did not know about or had met before. We chatted and were served home made flour tortillas wrapped around some home made refried beans with cheese.  Great burritos! Sun tea,  iced and sweetened made lunch perfect!

After lunch we took a walk further up the mountain to check out the progress on his guest cabin that he is building.  Beautiful work! It has a loft! I would love to be a kid and sleep up there!! LOL!!

After the cabin tour, we left for the town of Mora, another 7 miles down the mountain. That is our local town to get basic supplies like gas and Ice Cream! Yummy!

All in all it was a very nice day. This morning, I got an early start and was missing my son because his visit was so short. He left yesterday after the ice cream.  So this a.m. I immersed myself in my sewing and cutting some scraps into triangles, squares, and strings for the basket weave quilts. Yes, I said quilts! I have decided that I will make only basket weave quilts for my children. That way there is no complaining about colors or styles! LOL!  So, I will be cutting my scraps and sewing basket weave string blocks for a while!!