Saturday, May 16, 2015

Scrappy Cushion, Part One

I bought a cheap rolling office chair for my sewing desk a few weeks ago. Because of the up and down nature of ironing, cutting and sewing fabric, using a regular chair is hard on the chair and the floors.


After sitting on this rolling chair for a few weeks I noticed how hard the cushion felt after a few minutes. I decided to make a cushion from my scraps to use on this chair.

I have been saving all my tiny crumbs (pieces of fabric less than one inch square), sliver trimmings from squaring up my blocks, thread ends from taking out bastings and that small piece of embroidery thread that you can't use for anything.

My neighbor gave me a large plastic bin that she had saved from her last get together, where the cheese balls had come. See picture below. I also had a small container full of these little bits. I put the tape measure in the picture so you can get an idea of how tall the bin is.


Now what was I going to use for the cover? I didn't want to use good fabric because this was only going to be the inner casing to put the tiny scraps into.  I want to be able to take the "nicely" decorated outer cover off for laundering. Kind of like a pillow case but fitting more snugly.

I decided to use an old pillow case. As you can see by the character on it, it is very old but still in useable shape.


I draped the pillowcase over the seat of the chair and cut it down to a size that leaves enough room for the stuffing and the hem to close it.


After stuffing and sewing the pillow case closed, I had to deicde what quilt block will I use for the outer "decorated" casing?

Since I have several small "orphan" blocks, you know, those "test" blocks, blocks that came out wrong for the design or blocks that didn't quite meet my expectations; I decided to use those with some sashing around each orphan.

I will take pictures as I put the cover together and post those on another day.

Meanwhile, keep on quilting!

Aveli


Friday, May 15, 2015

Hexagon Box Pattern

I am reposting this for those of you that are working on hexagon quilts.  The Hexagon Box Pattern is still available.  If you are not familiar with this pattern that I designed, here is some information on it from a previous post . . .

http://avelisquilts.blogspot.dk/2013/07/hexagon-box-repost.html

If you would like to see what a customer did with her pattern, go to this page . . .

http://avelisquilts.blogspot.com/2013/08/customers-picture-of-hexie-box.html

The offer in the above posting still stands. If you make this pattern box and send us a picture by email and we post it on my website or on this blog, we will send you a packet of freezer paper hexagons as a thank you. 

You can always buy containers, but I like to recycle as much as I can. So, I use cereal boxes. They are a perfect thickness and easy to use. Plus it keeps trash out of the landfill.

It's a short posting today!

Meanwhile . . . keep on quilting!

Aveli

Monday, May 11, 2015

Simple Needle case


After years and years of putting my needles on my spool of thread while working on my projects (see photo) I decided to make a simple needle case (book style).


I didn't want it to be too large so I cut the "cover" fabric about 4"x 6". Of course you can make it whatever size you want. Just remember to allow at least half an inch on all four sides to turn under for the finished hem.


The "pages" where needles and pins will be placed are sized 2 3/4" x 2 1/2". One side is bigger to allow for the "binding" edge where it will be sewn all together. I used three "pages" of leftover batting in black and white. I used black in the middle so it would be easier for my aging eyes to separate the individual pages.


Position the batting inside of the cover fabric to make sure there is enough room for the hems. Also make the back cover extend beyond the pages leaving enough to hem and to bring forward to close the book. 


Fold the hem of the front cover to where it will cover the pages. 


Bring the back cover forward to make sure it overlaps the front


Sew the front hem and sew all the hems around all sides. I used straight stitch but a decorative stitch will dress this up quite a bit.


Position your pages in the middle and sew through all the layers on the left side. Notice that the back cover extends beyond the front cover and the pages.


This is almost finished! I just need to decide what fastener I want to put on the cover to keep it closed.


This is the open view with the pages sewn in.

I hope you enjoyed this little tutorial. I plan on making one of these to keep with each individual project. They are super easy to make because they are not fancy.  Although if you want to decorate it with embroidery or quilting you can. If you make one of these, send me a photo and I will post it on my website and here in the blog. 

Looking forward to hearing from you. . . keep on quilting!

Sunday, May 10, 2015

Hexagon quilt update

Here is the latest on my 1" Hexie "Insanity" quilt.


It has grown a little since this last picture. I will post it as soon as I can.

Today I am taking it easy for Mother's Day!
Till next time . . . keep quilting!

Saturday, May 9, 2015

HAPPY MOTHERS DAY!

For tomorrow that is!

It's been awhile since I have posted anything! It is amazing how quickly time passes.

There have been numerous upheavals, downward spirals, great challenges, and wonderful happenings since I last posted . . . too numerous to post now! So I will begin at the present!

This time of year there are a lot of graduations happening all over the nation. In our family I can think of two immediate family graduations, both of them female and both of them from college.

Congratulations Ladies!  We need more women to continue to get a higher education diploma!

Before I get on my soap box, I will start with my status on my quilting.

I have been continually working on my 1 inch hexie quilt.  Since this project only comes out when I travel in the car or train, it is still far from completion.

Once I started the one inch hexie quilt, I fell in love with the whole process and have started a 3/4" Hexie dresser scarf or table runner. I haven't decided which way it will go until I how see the completed project looks. I am not using a pattern just throwing them together.  Thus the wait and see attitude!  I like the one inch hexies for my bed quilt, but I like the more delicate look of the 3/4" hexie size for the table or dresser.

I am using Freezer Paper Hexies for both projects. Freezer paper is so much easier than any other method. It cuts down on basting and removing basting and as such cuts the time needed to complete the project. This project comes out whenever I am not working on the sewing machine or hand quilting other quilts.  So hopefully I will have this project done by the end of summer!

I have added a new page to my blog with some of the items that I sell on my website.  The 3/4" Freezer Paper Hexie is the first item I have listed because it is on auction on Ebay.  But, I also sell it on my website. I also sell 1" and 2" hexies on my website and other freezer paper shapes. Take a look . . . www.avelisquilts.com

If you are not sure about Freezer Paper and do not want to commit to buying a bunch of hexies that you will never use, please email me and I will send you a sampler to try out.  You will receive 3 pieces of each size that I sell on my website, 3/4", 1" and 2" and an instruction sheet to help you get acquainted with the freezer paper method -- at no cost to you!

Well I guess that's it for now .... Happy Quilting!

Sunday, August 3, 2014

Taking a lunch break

I have been working on getting my stuff together for the next flea market event in Mora at the VFW Hall on August 9, 2014; which is next Saturday.

We had brought quite a few boxes from our storage unit in Las Vegas this past week.  Little by little we are emptying that unit and filling up the unit here at home.

Among the boxes we brought was a small container full of ribbons and lace that I have had since I don't remember when.  See picture below


The grey container in the picture above was tightly packed and full to the brim.  I started sorting and measuring so I can sell them at the flea market.

When I decided to take a lunch break this is how much I had measured and packaged . . . 


Just a little over a shoe box size full and the grey container is still half full!  I still have a lot of work to do on this project before Saturday.  But, first I took a lunch break!

My husband had made some wonderful New Mexico Red Chile for us. He is one of the best New Mexico Red Chile makers ever. So I made myself an enchilada, New Mexico style (stacked) without the egg, and lots of cheese for lunch.


WOW! I can't believe I ate that whole thing! Boy was I hungry!


Now for a quick dessert! YUM! YUM!
Chocolate always helps cut the spicy of the chile.


Now it's time to get back to work!

Thursday, July 24, 2014

New Scrappy Purse

I needed a small purse to carry my phone this weekend. We are going to the Mora Fiestas on Saturday. There is going to be street dancing so I didn't want to take a big bulky purse. I used two of my crazy quilt squares that I always sew.  . .have tons of them. The lining is made from fabric that my daughter in law gave me.  I also used that fabric to add a small money pocket. Then I added a strap so I can carry it over my shoulder while I dance! That is if my hip is in good condition!! LOL!

The purse is in front of the vintage machine that I cleaned up and got it running. Very very nice machine and powerful.

Saturday, July 19, 2014

Small Tornado Hits My Hexies!

So I am over at my daughter's house. We came to have a family barbecue. We were not able to get together for " Fourth of July" because of my hip so we are getting together now.

Anyway, I brought my plastic bin full of quilting supplies to work on my hexies while we drive here and while I have down time at my daughter's house.

I usually only work on them in the early morning hours and in the late evening before retiring. Yesterday I brought the bin out and was working on the hexies while the granddaughter was still asleep. I didn't pay attention when she came down and she saw the bin.  Of course her two year old eyes lit up with the possibility of a new toy! She was very polite and asked if she could touch the hexies. I guess she thought they were puzzle pieces. She was trying to lay them out and connecting them like puzzle pieces.

She loved all the pieces, there were so many! Then I asked her what color the pieces were and she got every one correct except the grey!

We had a great time "sewing"!

I told her mommy that I hoped this was an indication of her interest in quilting! LOL!!

The first picture is what my bin looks like normally and the second after the "little tornado" did her "sewing"!

Wednesday, July 16, 2014

Going to Albuquerque

We are on the way to Albuquerque to visit our daughter, son, and grandchildren.

Very beautiful scenery along the way.

We are approaching a village called Sapello (saw-pay-yo) when you're heading south from Mora toward Las Vegas, New Mexico, USA on highway 518.

As you pass Sapello and get closer to Las Vegas, you will pass Storrie Lake on the right. Because of the drought we have been experiencing, the level of the lake is pretty low.

But, even as low as the water is, it is summer and there are always campers in the Storrie Lake State Park.

I always enjoy our drive down from our mountain no matter how many times I see it.


Sunday, July 13, 2014

Sewing in New Work Space

I was busy all day yesterday selling at the Flea market in Mora,  so I didn't have time to either work on organizing my new work space or to sew. For the past three days I have been unable to work on this space or to sew.

Today I felt like sewing!

My new work space is very cramped at the moment. There is almost no space from the front of my improvised table to the wall. I can not put the foot pedal on the floor to use with my foot. So, I taped it to the side of the boxes that are  holding up the sewing machine. 

To make the machine go I just squeeze it with my knee.  It's very comfortable. And its nice to not have to chase the foot pedal!  

When I put in the table that is to go here I will have to figure out how to keep the pedal by my knee cause I really like it!


Saturday, July 12, 2014

Working the Flea Market

Today is the flea market at Mora. Come on down if you are in the area.

Wednesday, July 9, 2014

Flea Market at VFW Hall

This Saturday there will be a flea market at the VFW hall in the town of Mora, New Mexico, USA, starting at 8 am.

I am selling my quilting goods, freezer paper hexagons, pre cut fabric hexagons, 2 1/2 inch fabric strips, fat quarters, fat eights, fabric scraps, fabric yardage, thread, batting and various other crafting stuff.

I am also selling a crib and an Eddie Bauer high chair - all wood, that we bought to use when our granddaughters came to visit. They are now out of that stage so we don't need them anymore.  They are practically brand new. They have been in storage longer than they were used.

And of course since it is a flea market, we will be selling any other "stuff" that we can dig out of storage.

So if you have nothing to do and are in the area, drop by and say hello! It's free to get in!

Monday, July 7, 2014

Holiday Weekend is Over!

The "Fourth of July" Holiday weekend is over! Had a marvelous time. We went to the Las Vegas Fiestas to see Al Hurricane, a famous "Northern New Mexico music" band.

When we arrived at the park in "Old Las Vegas", we parked and walked to the central park area where the vendors,  music and dancing were to happen.

There were hundreds of people walking, standing and talking, sitting on lawn chairs and on the grass. The lines for the food vendors were long as they usually are for hot dogs, hamburgers, funnel cake, ice cream, sodas, snow cones, indian tacos, sopapillas, red or green chili, ribbon fries, turkey legs and various t-shirts, bracelets and other trinkets.

We were lucky enough to find a spot to sit on the grandstand in front of the bandstand and dancing area. The music was good and loud! As we were looking around for anyone that we might know, my husband's family is from around the Las Vegas, New Mexico area, I felt a raindrop! Oh No! I told my husband we would have to leave if it started raining. . . and sure enough! The amount of rain escalated so rapidly that by the time we ran (as fast as I could with my healing hip) to the parking place for our truck, we were both drenched to the skin. I had no towel to dry off with so I used the inside of my sweatshirt sweater, LOL! I usually carry a towel in our SUV but we were in the truck. We took the truck instead of the SUV because we were planning on moving boxes and furniture from storage after we had listened to the music at the festival.  But, with the rain, we decided not to move anything. We didn't want to risk any items getting damaged by the rain.

So, we went to one of our favorite restaurants, "The Hillcrest" in Las Vegas. By that time it was lunch time and we had to wait to be seated because of the lunch time rush. We had a good lunch in spite of the fact that we were still in very wet clothes. Before we headed home we stopped to do some grocery shopping. It was still raining on our way home to Guadalupita, which is 40 miles away.  As we approached our home village, the rain slowed and stopped completely. But, as we finished putting our groceries away, the rain started again.  This time we were inside our cabin, completely dry in warm and comfy clothes.

The rest of the evening, we watched our usual Saturday lineup of country music shows on RFD TV. Then we watched the fireworks from the capital. It was still raining so no one was shooting off fireworks in our vicinity.

While we were on the way to and from Las Vegas I worked on my Hexie project. I got quite a few hexies basted. Since we were bouncing around in the truck, I couldn't do the fine stitching needed to connect the hexies so I settled for basting the individual hexies.  I only have about a thousand more to baste so it was an accomplishment!

Sorry there are no pictures! I was so preoccupied with the rain at the festival, I totally forgot to take pictures.  Maybe at next year's festival.

Friday, July 4, 2014

Update on Sewing Room/Studio

I have been working on my new working space and wanted you to see the progress.

The first photo is the whole corner where I am starting to organize. This is Where the bed was before we took it out.

My two vintage machines are under the colorful covers.

The second picture shows the corner with the machines uncovered.  . . I had to show them off!! LOL!

Still a lot to do but I am able to get in here and sew.

Thursday, June 26, 2014

New Work Area/Studio?

Well after laying low to heal my injured hip, I am raring to go! Feeling much better today so we have started tackling the job of cleaning my work area. But it's more like moving my work area from a 3 x 3 square foot area to a larger and more private area that is all mine!  I have really enjoyed being able to just sit and sew on my "insanity" hexie quilt for three days, but I am really, truly excited about having all my quilty "stuff" together in one place!

The only problem with rearranging things is that you have to figure out where you are going to put the things you are moving.  It's kind of a domino effect, move one thing, the next thing needs to be moved, then the next and the next, etc.  Previously, the area I am repurposing looked like the picture below.


The bed in the picture is going out and that is where I am putting a desk, an ironing station and a cutting table. The area is pretty small but much larger than my 3 x 3 previous area.

Now I can take all my fabrics, quilts, patterns, threads, etc and put them into this space instead of being spread around in small areas throughout my property. 

All the plastic boxes with fabric will be put into the area above the air conditioner and in the cabinets behind the mirror on the right and left side of the picture.  Any leftovers will put into our new storage shed that my husband just finished building.  At least that is the plan . . . I'll update you as the work progresses.

It shouldn't take too long because I have been planning, folding, cutting, taking pics of fabrics and cataloguing for the last 6 months.  So, I think it will go very smoothly . . . I hope!

Sunday, June 22, 2014

Working the hexies!

Some advice.  . . When you get to be a senior, don't try to do too many physical stunts or silliness.  . . You''ll throw your hip out!!
Well I did just that trying to imitate a model on t.v.  you know that exaggerated hip swinging walk they do?
Right in the middle of my second step a very loud and audible to everyone pop and then PAIN!!
Needless to say I have not been able to walk properly for three days!
So of course I had to turn to my hand sewing project to keep from going crazy!!
I worked on my" insanity" hexagon quilt. This is as far as I have gotten.


Friday, June 6, 2014

Restoring a Dead Vintage Singer Sewing Machine

Since a lot of people have emailed me asking to elaborate on what to do to clean and restore old sewing machines, I did some research and found a series of 8 videos on You Tube.

If you are just starting out with a vintage machine the following videos by Duncan Hill are worth watching. He does a thorough job of explaining how to dismantle the machine, clean the machine and of course put it back together.  

Here is the link:

If the above link does not work do a search on you tube for the title above.

Remember there are 8 parts. I saved them to my watch list, that way I can quickly find them if needed.

Even though these videos are specific to the hand crank singer, most of the old singer non-motorized
machines are very similar.

I hope this helps everyone with restoring or just cleaning the vintage singer machines.  

Let me know how you do.

Monday, June 2, 2014

What To Do With Small Scraps?

What do you do with small scraps, or "crumbs" as some people call them?

I am a hoarder, as my husband calls me, of fabric. I love and breathe fabric! I can not look at a piece without touching it or wanting to buy it, if available and affordable. Way back when I started sewing my own clothes, I started thinking what should I do with the left over fabric?

Here comes my two aunts to the rescue. They made a lot of their own clothes if not all of them. One aunt suggested I save my pieces and coordinate them in color so I could piece a blouse, jacket or pants. After she said this, she showed me a top that had 20 pieces! She made it from scraps of her previous projects. It was really nice. I was very impressed that she had the mind set and patience to piece together a pattern that would look nice. The color scheme was great and she used a lot of top stitching so that the pieces looked like part of the design. I loved it! But, I did not want to put that much thought and effort into the design and all that top stitching!!!  After all, I was just a teenager and patience was not one of my virtues.

Then I went over to the other aunt's house and she was working on a "crazy" quilt. I inquired as to what pattern she was using and why she had so many colors and sizes of fabrics.  She told me when she makes an outfit, the left over scraps go into her quilt scrap bin saving them for a "crazy" quilt. I was fascinated by the twists, turns, colors and designs of the various fabrics and the fact there was very little planning other than which fabric you liked next to which fabric. I WAS HOOKED!!!

My fabric saving obsession started then. It was my aunt's fault for introducing me to saving the smallest scraps. Larger scraps for sewing together into a pieced or "crazy" quilt and smaller scraps for applique. I knew about quilting squares but had never heard of  "crazy" quilting . . .this was before the internet and the abundance of quilting magazines that we have now.

Today I would like to show you a sample of the pieces that I acquire while cutting fabric for customers.
These are some pieces that I have left over . . .


How I trim these down is what I will be showing you today. In the picture above right I had just finished cutting hexagons. You can clearly see some triangles, diamonds and some strips that can be cut from these pieces.  But what about pieces that are not so clearly defined? Here is an example . . .


I found this piece and was thinking to cut a long strip across the top. Then I noticed that if I used my
quarter square ruler I could cut a fairly large triangle.  I use two rulers when cutting difficult triangles. The quarter square triangle and half square triangle ruler.  After I cut this piece into a quarter square triangle I used the half square ruler because presently I am trying to cut a lot of half square triangles.

This picture shows a piece that has a tear in it . . .


Too bad it would have made a very nice large triangle. No matter, just move the half square ruler over a bit and cut away.

Here is a circle that didn't quite meet standards and I don't need a circle but need a triangle in this fabric. . .


Line it up with the edge of the circle and cut both sides to give you an angle. It will look like this . . .

Once you have this angle flip it so that it will look like this . . . 


Now you have an edge where you can line up your half square triangle ruler and finish cutting a triangle.

I hope this little tutorial will help you figure out what to do with your scraps. If you have any questions, please email me through the contact form on this blog. I will be happy to help.


Sunday, June 1, 2014

Which Triangle?

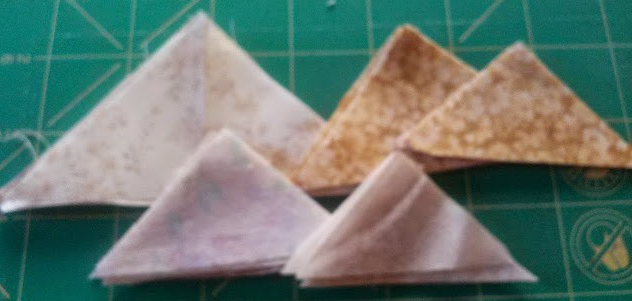
After I cut circles from fabric for customers, I am left with a lot of pieces.


I then cut them into triangles like this to use in my projects.


Sometimes the pieces are fairly large and being the frugal quilter that I am, I want to save as much fabric as I can.

I am undecided as to which way I should cut this piece.
This way for half square or quarter triangle


OR
This way with the trirecs ruller for a pyramid triangle? I just got this ruller and have not used it yet.


I was just wondering which would be the more thrifty way of cutting. I do not like to waste even little bits if it can be helped.


Friday, May 30, 2014

Not snow. . . FLOWERS!


We were headed home from shopping in Las Vegas, New Mexico and I saw this white streak on about 10 acres of land. Sorry for the remoteness of the picture, I took it with my phone.

Since it has been hailing the past couple of weeks and the weather has been so freaky, I thought it was left over hail or snow. Some of our higher hills still have peaks covered in snow.

My husband said no, that's not snow its flowers . . . white daisies!

Oh my! They were so beautiful! Then I began to notice they were everywhere!
Not on every piece of acreage, just here and there.

I had forgotten that every year at this time of year, with all the spring rains, we get these fields of wild flowers. They are never in the same field every year, the locations are very random. You never know where you will see all this beauty.

It seems the colors are never exactly the same. Last year they were golden yellow, the year before they were light lavender, and so on.  I have never seen white or red.

Whatever color they are they are so beautiful and so plentiful, they take my breath away. Being a city girl from California, I had never seen this beauty before.